Upon notification from a customer, users may add a Temporary Schedule on their behalf.
Adding a Temporary Schedule from an Alarm
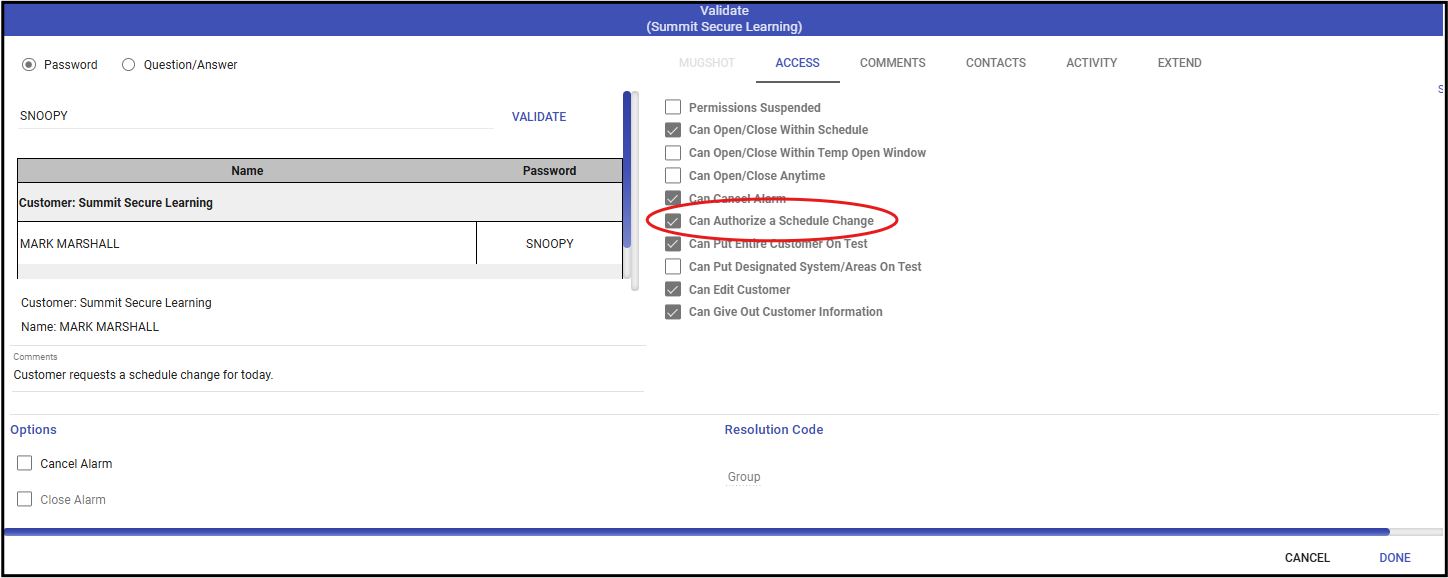
- Validate the customer contact and ensure they are allowed to change a schedule.
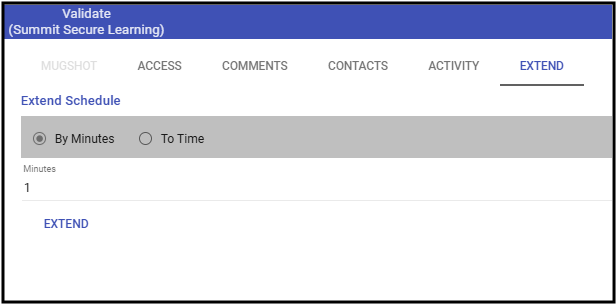
- When available, and if the change is only to extend the time for the Schedule on the current day, enter the minutes or time to add.
- If unable to extend the schedule, click the plus sign (➕) on the Schedule, validate, and update the schedule as necessary.

- Click Done.
- Confirm the schedule change.
- Complete processing the alarm.


