Areas, also known as partitions, are the sections of the property housing the zones, devices, sectors, and the like. Many sites have one (1) area. If the site has more than one area, it is possible to draw their boundaries and save them to Manitou on the plans.
Adding an Area to a Plan
- Select the Layer to which the Area is to be added.
- Expand the Areas section of the available items.
- Click the area to add and drag it to the plan. This sets the starting point of the drawing.
- Draw the border of the Area around the Layer. This is done by left-clicking at each point to draw lines that surround the layer.
- When done, right click to close the area. This changes color to the default color for the area.
- Save (💾) the record.
Editing an Area on a Plan
Once created, there may be need to correct or adjust the plan for color coding or to simply re-draw the plan.
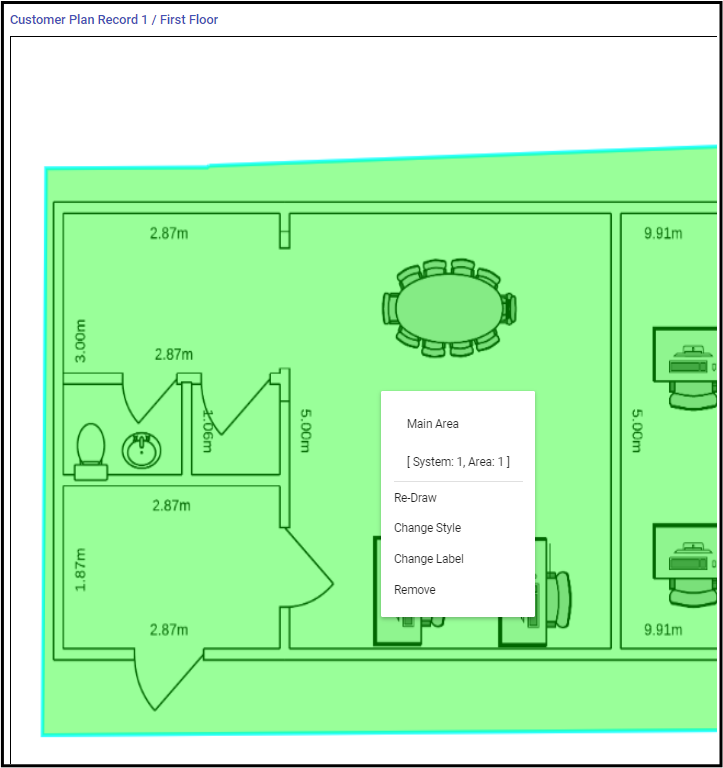
The Area description, located on the Area in the customer's System displays, as does the System and Area number assigned to the Area.
- With the Area Selected, right-click to review the options for your Area.
- Re-draw - Allows the clearing and redrawing of the area around the Layer.
- Change Style - Opens a dialog to adjust colors and textures for the overlaid area.
- Change Label - Allows the updating of the description of the Area.
- Remove - Deletes the Area drawing.