The GPS Tracking form is available on the Customer, Dealer, and Monitoring Company records. These display the GeoFences and Groups.
Adding a Group and a GeoFence
- Navigate to the GPS tracking form on the Customer, Dealer, or Monitoring Company record.
- Click the Plus sign (➕) to the right of the GeoFences and Groups
- Add the Group for the GeoFence by Selecting Group and Entering the Group Name.
- Click Done.
- Click the Group name.
- Click the Plus sign (➕) again.
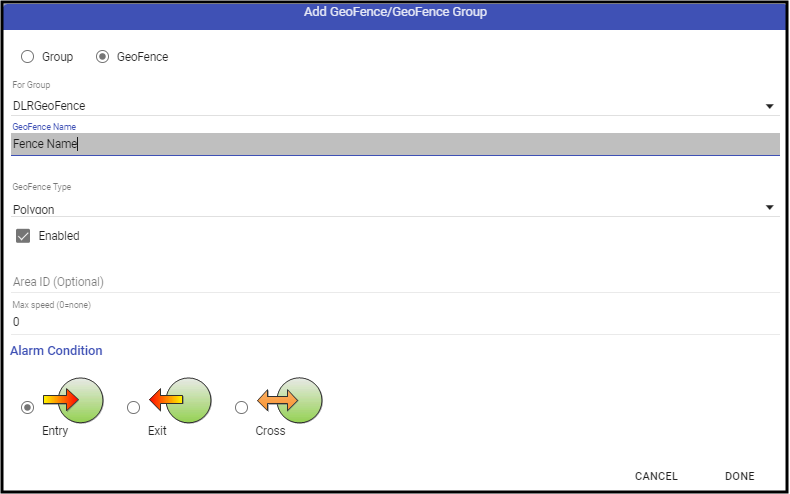
- Enter a name for the GeoFence.
- Choose the type of Shape - Polygon or Circle.
- If assigned to a specific Area, select the Area ID.
- Set the Max Speed, if tracking a unit's speed.
- Choose the Alarm Condition.
- Entry - Alarm is triggered by entering the fenced area.
- Exit - Alarm is triggered by exiting the fenced area.
- Cross - Alarm is triggered by entry or exiting the fenced area.
- When all is entered as expected, click Done.
- Draw the GeoFence.
- Save (💾) the record.
