Some responding Authorities require, Permits in order to help authorities track alarm systems and cut down on false alarms, which waste resources. These permits ensure systems meet safety standards and provide contact info for quick emergency responses. Fees from permits may be required, from the Authority, to cover admin costs.
Adding a Permit to a Customer
- Select Permits from within the Customer forms on the left-hand side navigation.
- Click the pencil icon (✏️).
- Click ADD.
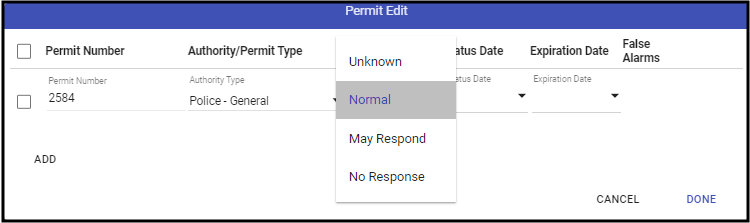
- Enter the Permit Number.
- Select the Authority/Permit Type.
- Set the Status. This status is manually updated but can experience changes based on the False Alarms Limits set on the Authority.
- Unknown - No known status of the Permit.
- Normal - Normal Response for the monitored location.
- May Respond - Site with Permit has experienced some false alarms, but the Authority will continue to respond to the monitored location.
- No Response - Site with the Permit reached the false alarm limit or had the permit revoked and the responding Authority, will not respond.
- Set the Status Date - This is the start date of the Permit.
- Set the Expiration Date - This is the expiration date noted on the permit. If there is no listed expiration date, leave this blank.
- Repeat as necessary.
 When Done, click Done.
- Save (💾) the record.
 When Done, click Done.
Editing a Permit
- Select Permits from within the Customer forms on the left-hand side navigation.
- Click the pencil icon (✏️).
- Select the Permit to change.
- Make the appropriate changes.
- If deleting, click the trash can (🗑️) icon.
- When done, click Done.
- Save (💾) the Record.